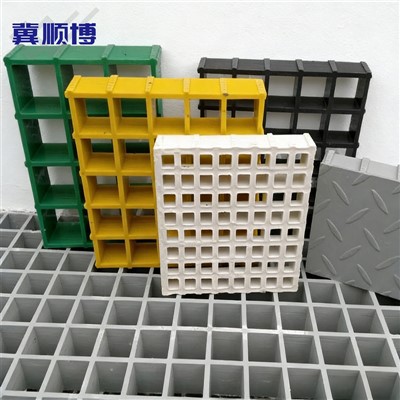

Hey there! As a supplier of riveted grating, I'm super excited to walk you through the installation process of riveted grating. Whether you're a DIY enthusiast or a professional contractor, understanding how to install riveted grating properly is crucial for ensuring its longevity and performance. So, let's dive right in!
Pre - installation Preparation
Before you start the actual installation, there are a few important steps to take. First off, you need to measure the area where the riveted grating will be installed. Make sure to get accurate measurements of the length, width, and any irregularities in the surface. This will help you determine the right size and quantity of grating panels you'll need.
Next, gather all the necessary tools. You'll typically need a drill, rivet gun, measuring tape, level, and safety equipment like gloves and goggles. Safety should always be your top priority, so don't skip out on the safety gear.
It's also a good idea to inspect the riveted grating panels for any damage or defects before installation. Look for cracks, bent bars, or loose rivets. If you find any issues, contact your supplier (like me!) right away to get replacements.


Site Preparation
The installation site needs to be clean and free of debris. Remove any dirt, dust, or loose materials from the surface. If the installation area is uneven, you may need to level it using a suitable leveling compound or by adjusting the support structure.
Ensure that the support structure is strong enough to hold the weight of the riveted grating. The supports should be properly spaced and securely fastened. If you're installing the grating on a floor, make sure the sub - floor is in good condition. For outdoor installations, consider the effects of weather and corrosion on the support structure.
Installation Steps
Step 1: Positioning the Grating
Start by placing the first grating panel in the desired location. Use a level to ensure that the panel is perfectly horizontal. If the panel is not level, you may need to adjust the support structure or use shims to level it.
Make sure the grating panels are aligned properly. The edges of the panels should be flush with each other, and the bars should be parallel. This will not only make the installation look better but also ensure the structural integrity of the grating.
Step 2: Securing the Grating
Once the grating panel is in position, it's time to secure it. You can use rivets to fasten the grating to the support structure. Drill holes in the support structure and the grating at the appropriate locations. Make sure the holes are the right size for the rivets you're using.
Insert the rivets into the holes and use a rivet gun to secure them. Apply enough pressure to ensure that the rivets are firmly in place. Repeat this process for all the panels, making sure to space the rivets evenly.
Step 3: Joining the Panels
If you're installing multiple grating panels, you'll need to join them together. There are different methods for joining the panels, but one common way is to use clips or bolts. Make sure the joints are tight and secure to prevent any movement or rattling.
For a more seamless look, you can also use welding to join the panels. However, welding should only be done by a professional, as it requires special skills and equipment.
Step 4: Finishing Touches
After all the panels are installed and secured, check for any loose rivets or joints. Tighten any loose fasteners if necessary. You can also clean the grating to remove any dirt or debris that may have accumulated during the installation process.
If you're installing the grating in an area where it will be exposed to the elements, consider applying a protective coating to prevent corrosion. This will extend the lifespan of the grating and keep it looking good for years to come.
Types of Riveted Grating
There are different types of riveted grating that you might be interested in. For example, Special Shaped Steel Grating is great for applications where you need a custom - shaped grating. It can be designed to fit specific spaces and requirements.
Close Mesh Grating is another option. It has a finer mesh, which makes it suitable for applications where you need to prevent small objects from passing through. This type of grating is often used in industrial settings where safety is a concern.
Industrial Walkway Grating is specifically designed for walkways in industrial environments. It provides a safe and stable surface for workers to walk on, even in wet or slippery conditions.
Why Choose Our Riveted Grating
As a supplier, I can tell you that our riveted grating is made from high - quality materials. We use the latest manufacturing techniques to ensure that our grating is strong, durable, and corrosion - resistant.
Our team of experts is always available to provide you with technical support and advice. Whether you have questions about the installation process or need help choosing the right type of grating for your project, we're here to help.
Contact Us for Purchase and Consultation
If you're interested in purchasing riveted grating for your project, don't hesitate to get in touch. We offer competitive prices and excellent customer service. Whether you're a small business or a large industrial client, we can provide you with the right solution for your needs.
Just reach out to us, and we'll be happy to discuss your requirements and provide you with a quote. Let's work together to make your project a success!
References
- Steel Grating Handbook: A comprehensive guide on the types, applications, and installation of steel grating.
- Manufacturer's installation guidelines for riveted grating.